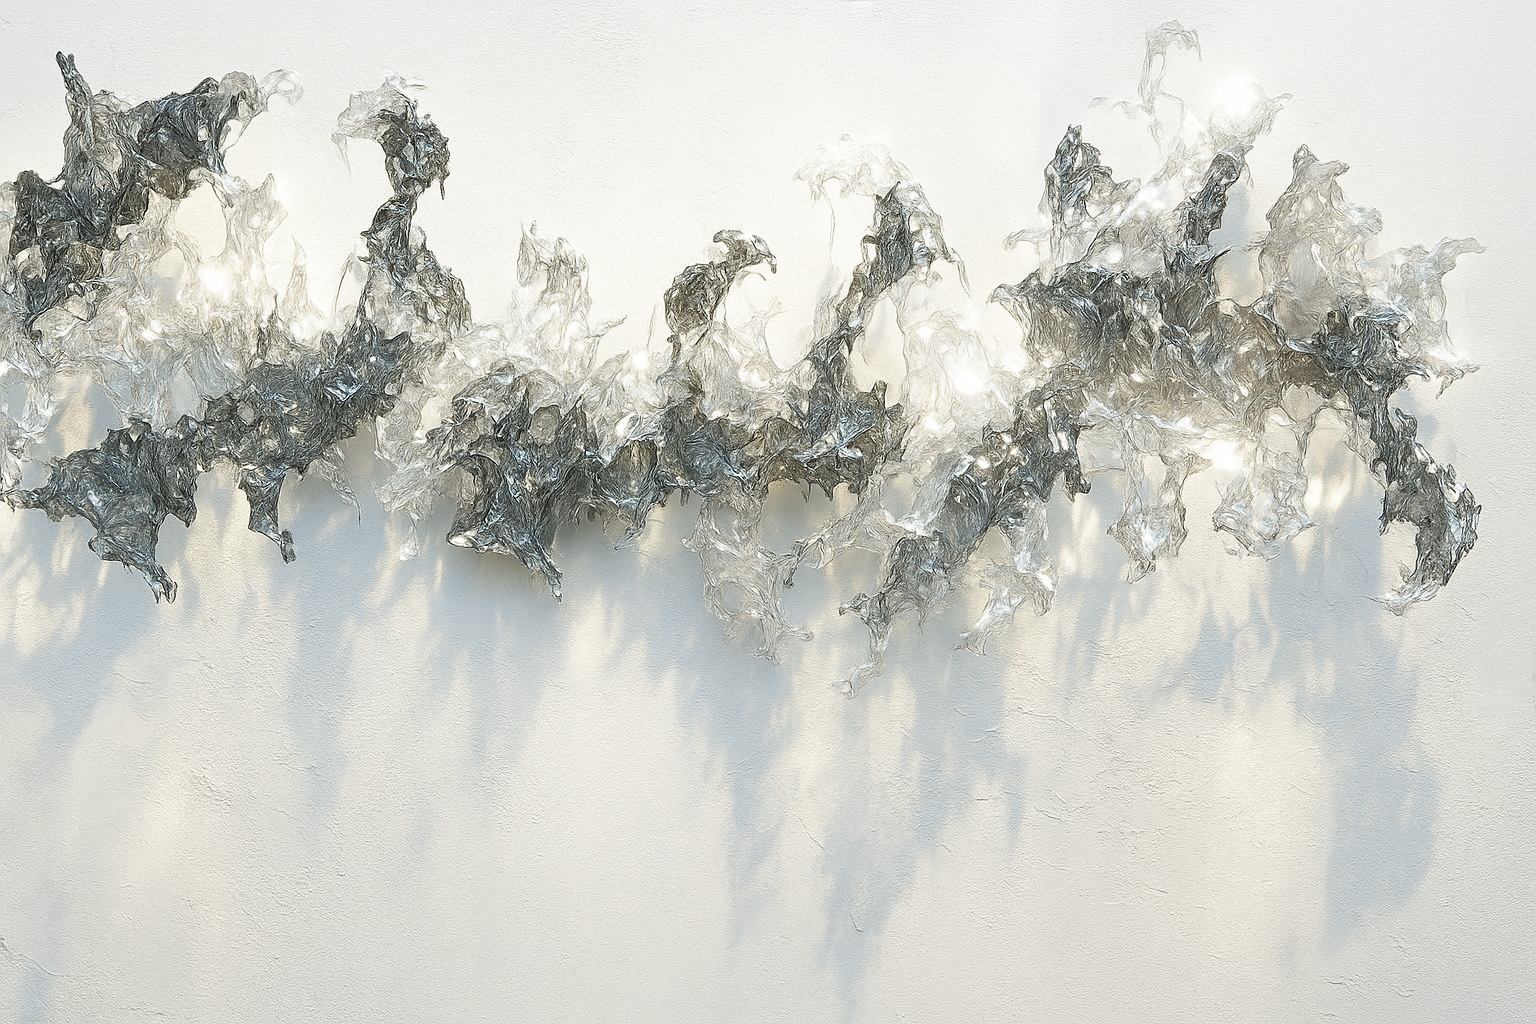
At the beginning of Unit 2, I carried on with my ‘Tilted time’ piece, gradually building up thicker layers of resin. I made the choice to attempt to take out the resin from the acrylic sheet when it became thick. This is where I encountered an unexpected obstacle.
I thought that the resin would not stick onto the acrylic sheet after it cured, as it has a smooth surface. When I took it off, I found the resin had formed an extremely strong bond to the acrylic.
I knew that alcohol could make it easier to pull apart my pieces. However, I didn’t use it because it could ruin the piece’s shine. I wanted to keep the shine and shape of the thing I was doing for quite a while.
I tried to remove it carefully, piece by piece. Although I was careful, the resin burst into lots of tiny pieces. I had to remove them from the acrylic one by one since there was no other option.

2025
Epoxy Resin
You can tell from the traces of resin used for bonding and the tiny cracks that a lot of parts were broken off before.
I believe there were several possible factors contributing to this challenge. The piece, appropriately named “Tilted Time,” was created by adding resin to the surface in multiple sessions, allowing it to flow downward, creating an effect like time suspended or locked in place. During this process, I couldn’t pour too much resin at once, as the uncured resin would blend together and flow down completely. This necessitated multiple casting sessions.
This incremental approach likely meant that the adhesion between each layer of resin wasn’t optimally strong, compromising the overall structural stability. Another potential factor was my use of different brands of resin with varying curing times, which may have prevented optimal bonding between layers.
Most likely, however, the primary issue was that the resin layers were too thin. The process needed more time to develop thicker resin layers. Alternative approaches could have included heating the back of the acrylic sheet to soften the resin for easier removal or using a release agent from the beginning of the process.


After this incident, I started looking for techniques that would enable me to easily strip the resin. Before this, I learned that demolding resin with baking paper with PTFE coating worked well, but wasn’t very good visually. Some substance would remain on the resin, which would affect its light transmission property.
Based on this, I began to explore other possibilities.
I looked for pure PTFE films, but they were either too costly or not in large enough sizes for my requirements. I started looking for plastics that would create effects similar to PTFE.
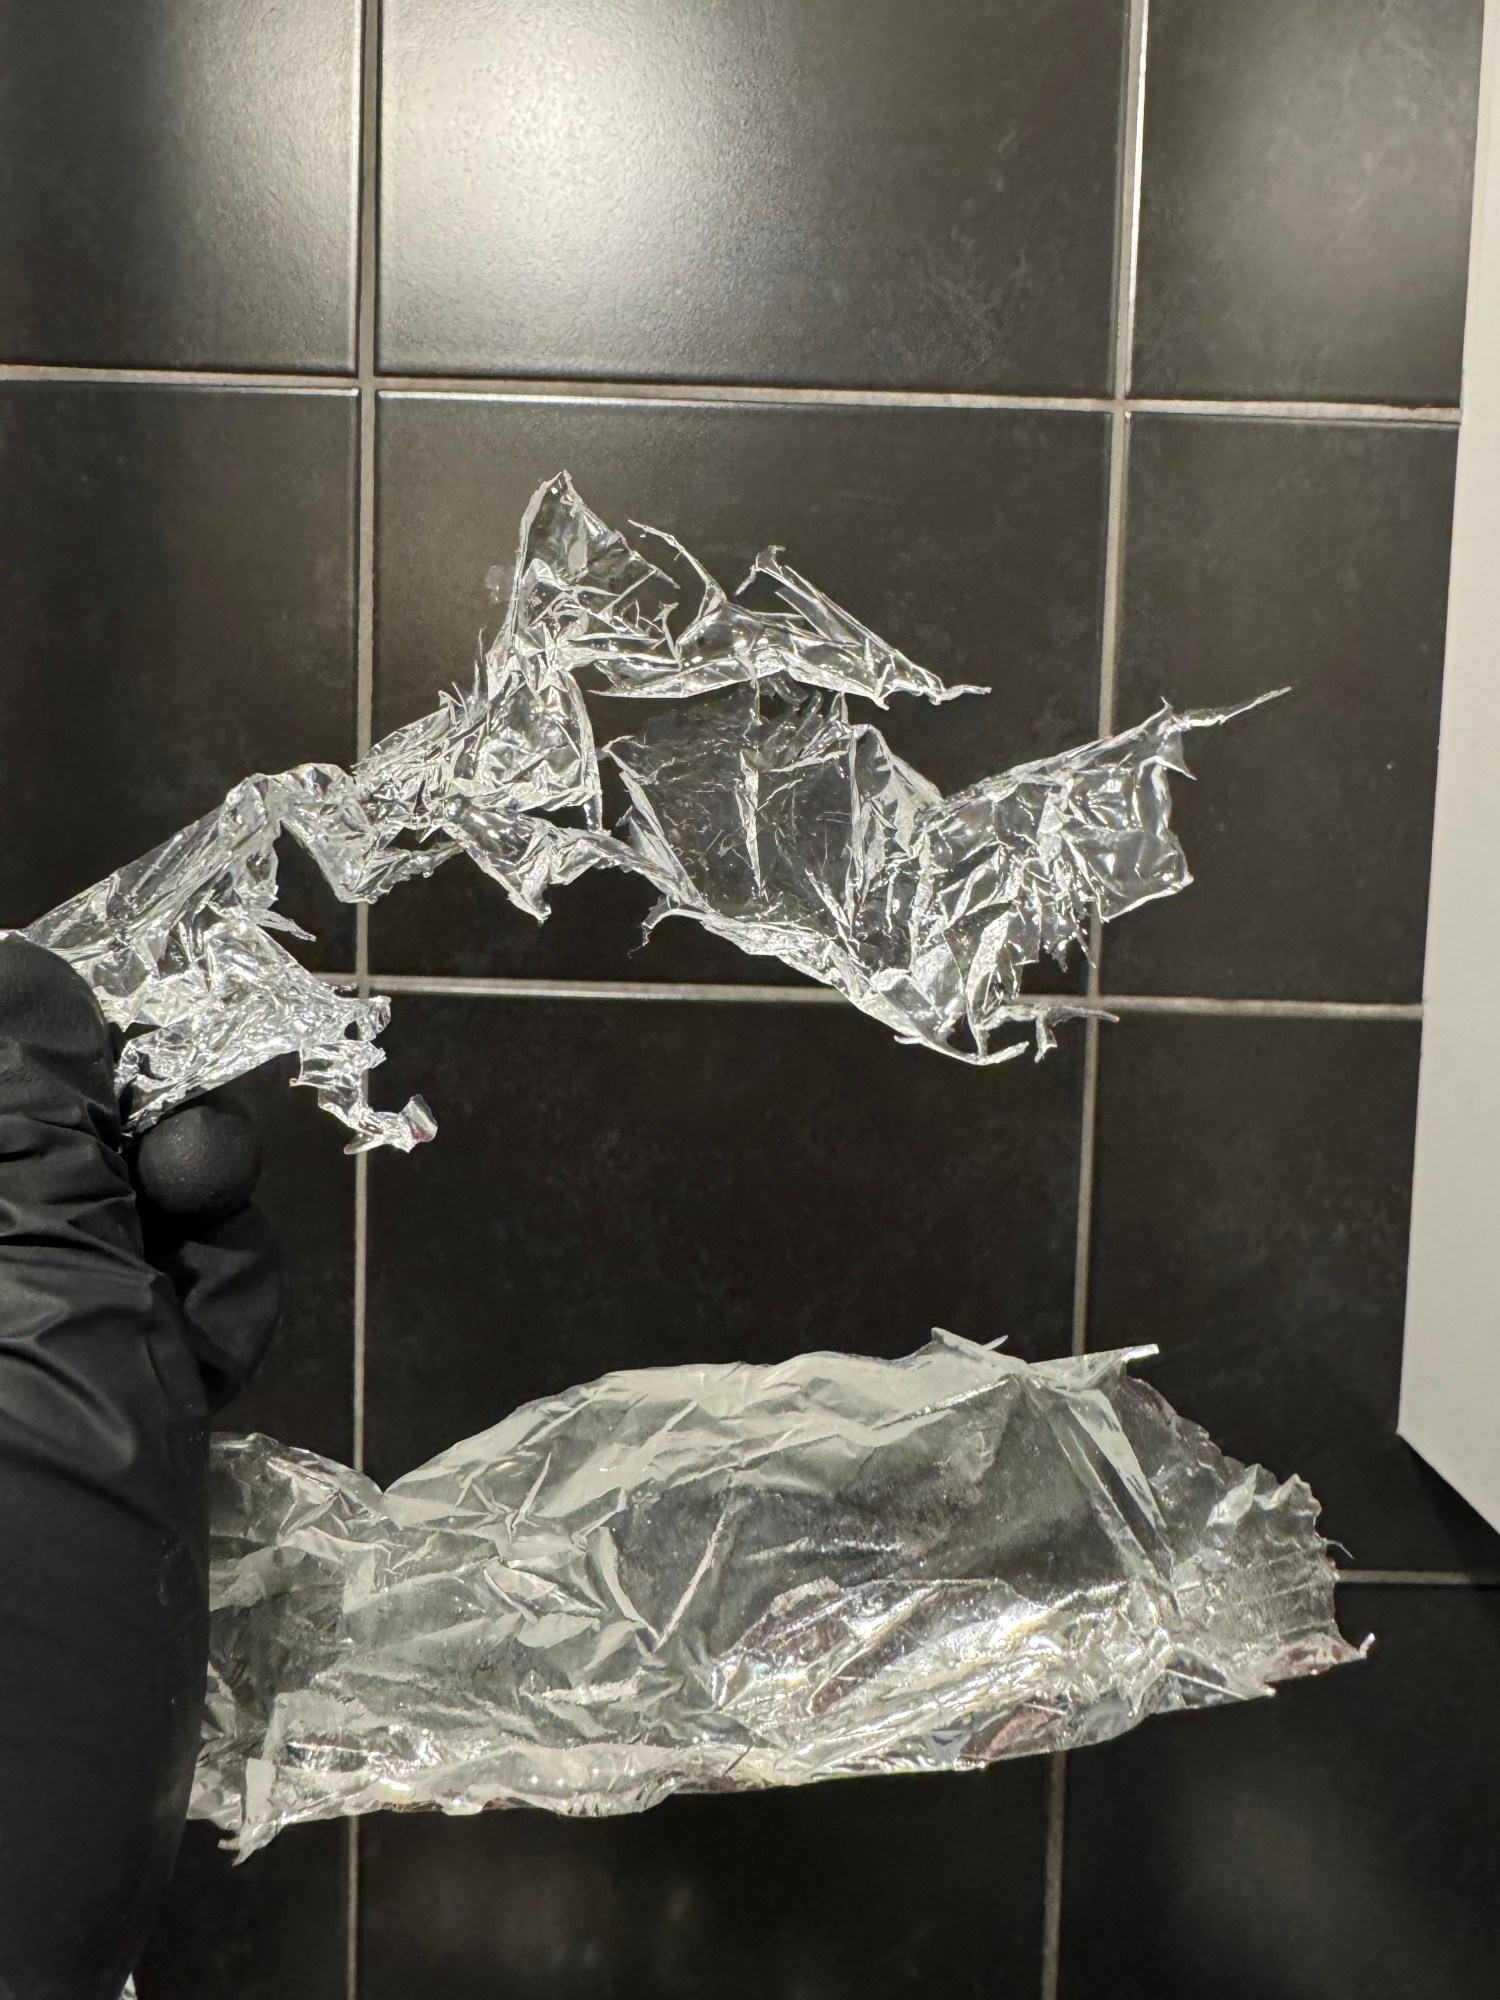
After much research, I found a material called Mylar film. This material is often found in food packaging and the electrical industry. This is interesting as Emergency Blankets are made from the same material. I bought some Emergency Blankets because of their properties and availability to start experimenting with this material to see if it can help me with demolding.
With these Emergency Blankets in hand, I was quite satisfied with the smoothness of their surface and their reflective properties. But, once they got unfolded, the creased lines were obviously visible, which was how they were packed. In order to remove the fold lines on the Emergency Blanket that I didn’t want showing up in my work, I purposely crumpled it into a ball to make it more random. I tried pouring the resin directly on and into this texture.
This idea wasn’t sprung out of the blue from my head, I have already tried it with crumpled baking paper. Nonetheless, the result was unsatisfactory because, upon being demolded from the baking paper, the surface of the resin was not particularly smooth and had retained white residues that diminished the visual appeal of the resin.
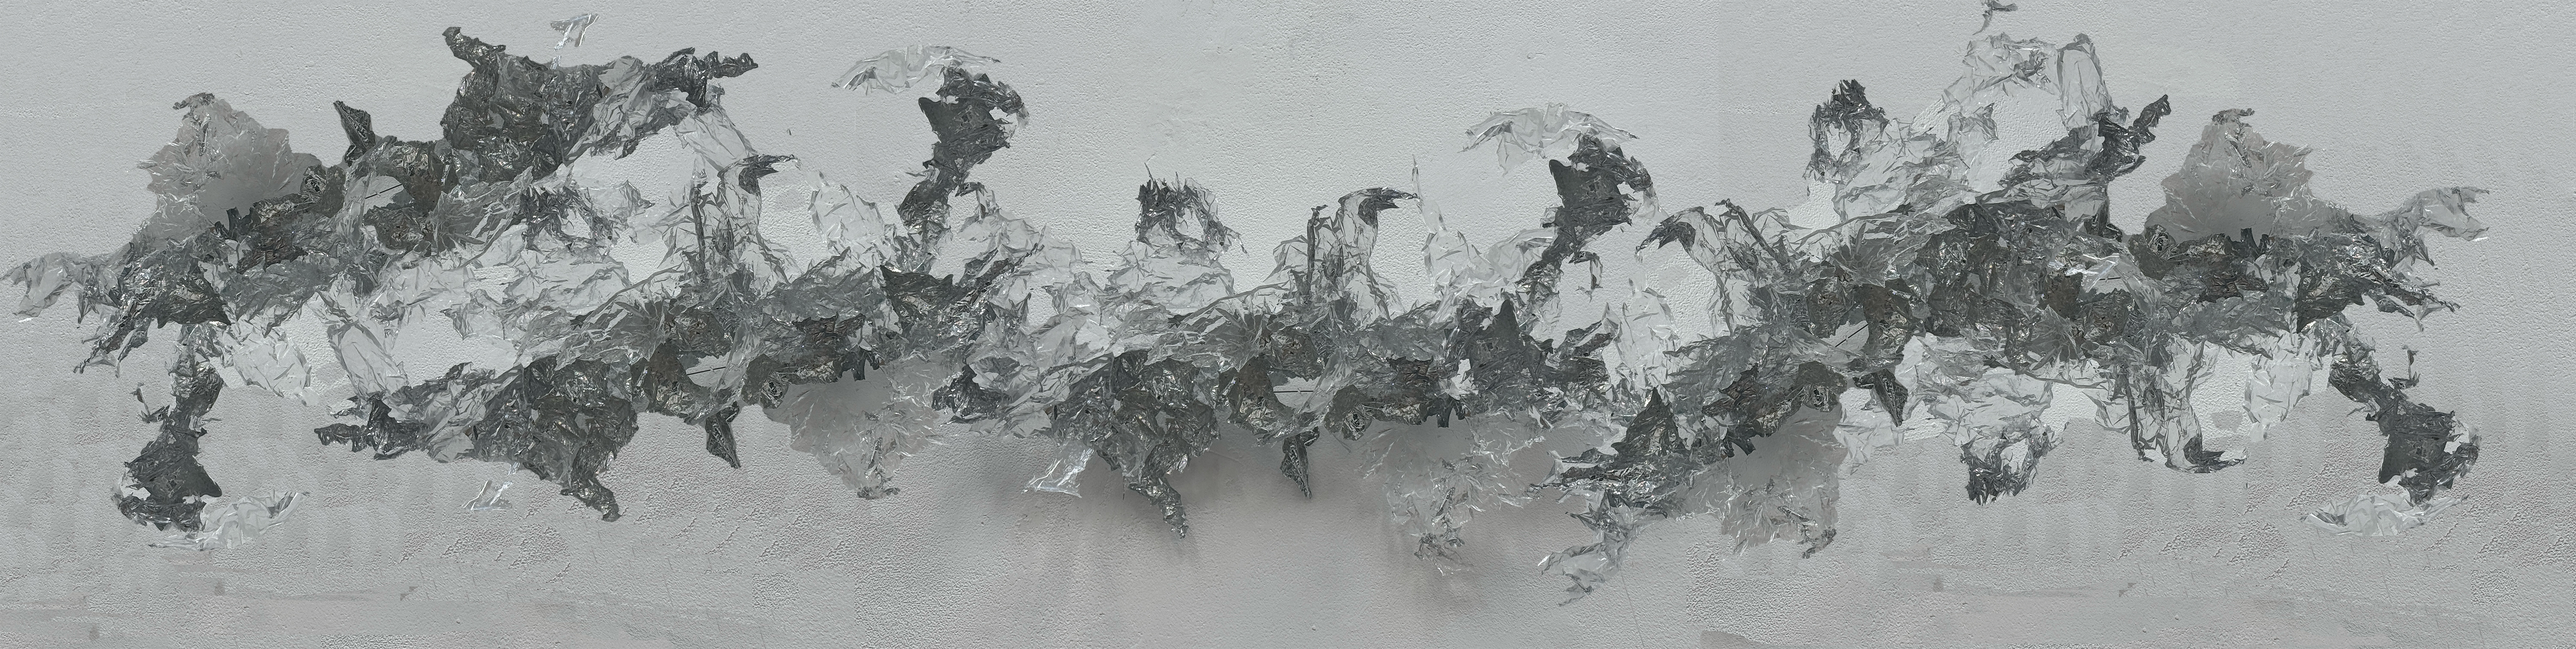
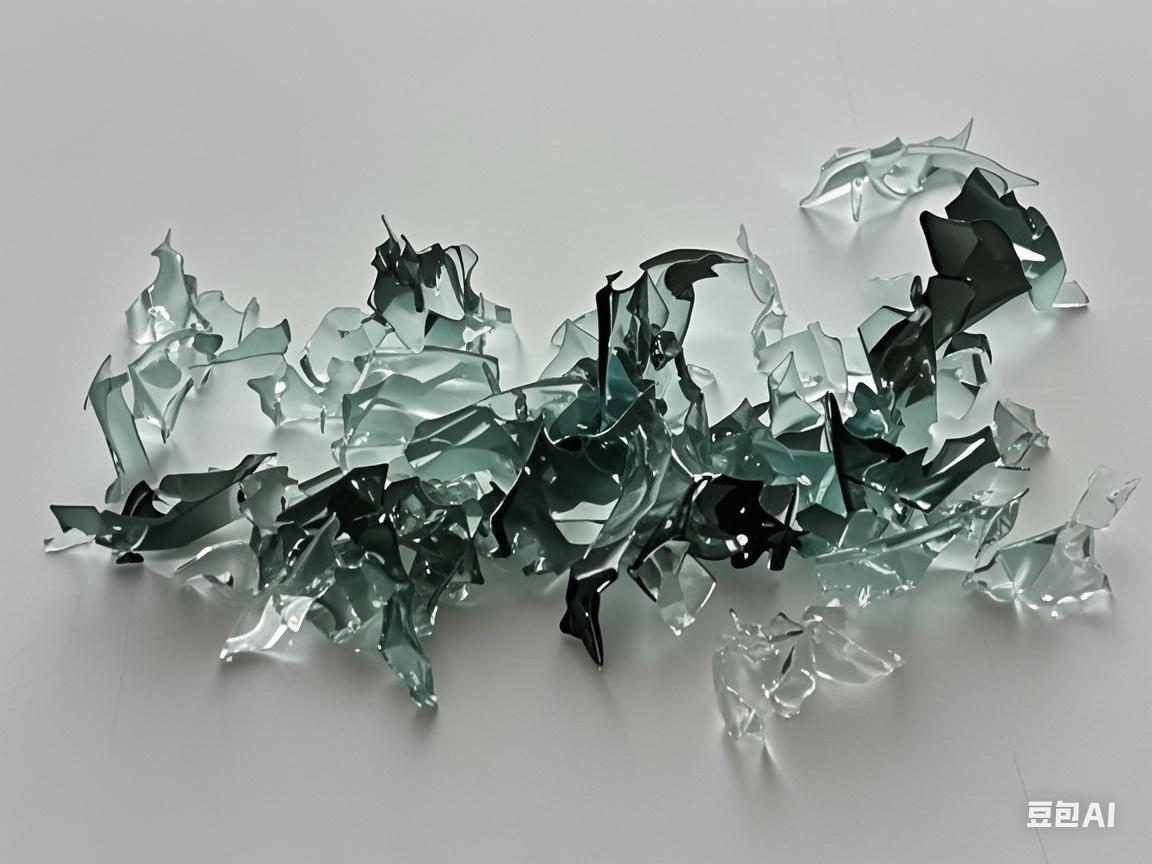
I discovered something amazing when I poured transparent resin on the Emergency Blanket, crumpled up. The brilliant finish happened because of the reflective quality of the Blanket and the clear nature of the resin. The randomly formed wrinkles interacting with the gravity-driven flow of the resin created numerous irregular geometric structures within the resin. The effect was visually compelling.
Unfortunately, when I tried to demould the cured resin, it didn’t come out easily as I thought it would. Even though they aren’t the best case, the reflective qualities of the encased Mylar film were nice.

2025
37x21cm
Epoxy resin and Mylar film.
After discovering this compelling combination, I decided to create an artwork titled “Shatterlight” utilising this new technique. I made many little pieces of the artwork and stuck them all together with resin. I was really pleased with the end result. With the reflective qualities creating a dynamic visual effect that captured exactly the aesthetic I was seeking to achieve.
Though they didn’t have very good natural resin-releasing properties, when the resin cover parts were separated from the blank, some of the Mylar film would release. They found something interesting, and that was that, after the removal of the Mylar film from it, it became even more three-dimensional in nature and even more crystal-like.
This made me think of other ways of releasing the resin from the Mylar, much easier than just stripping it out. I experimented with various release agents. At first, I tried a wax base spray, which allowed the resin to separate from the Mylar film, whereas the wax caused the resin to not be as transparent in the cast after I sprayed it on. Instead, it created a very subtle frosted surface. Though it was still considered clear, I did not like how it went.
I thought about putting another thin coating of resin over this surface, but I then realised that this has the effect of making such a surface less “sharp” in a three-dimensional sense, as it smooths down the microscopic detail and gives it almost a more rounded look. In other words, it essentially blurs the textural definition that would normally be retained. So, rather than compromise the look I was after, I started looking into other release agents.
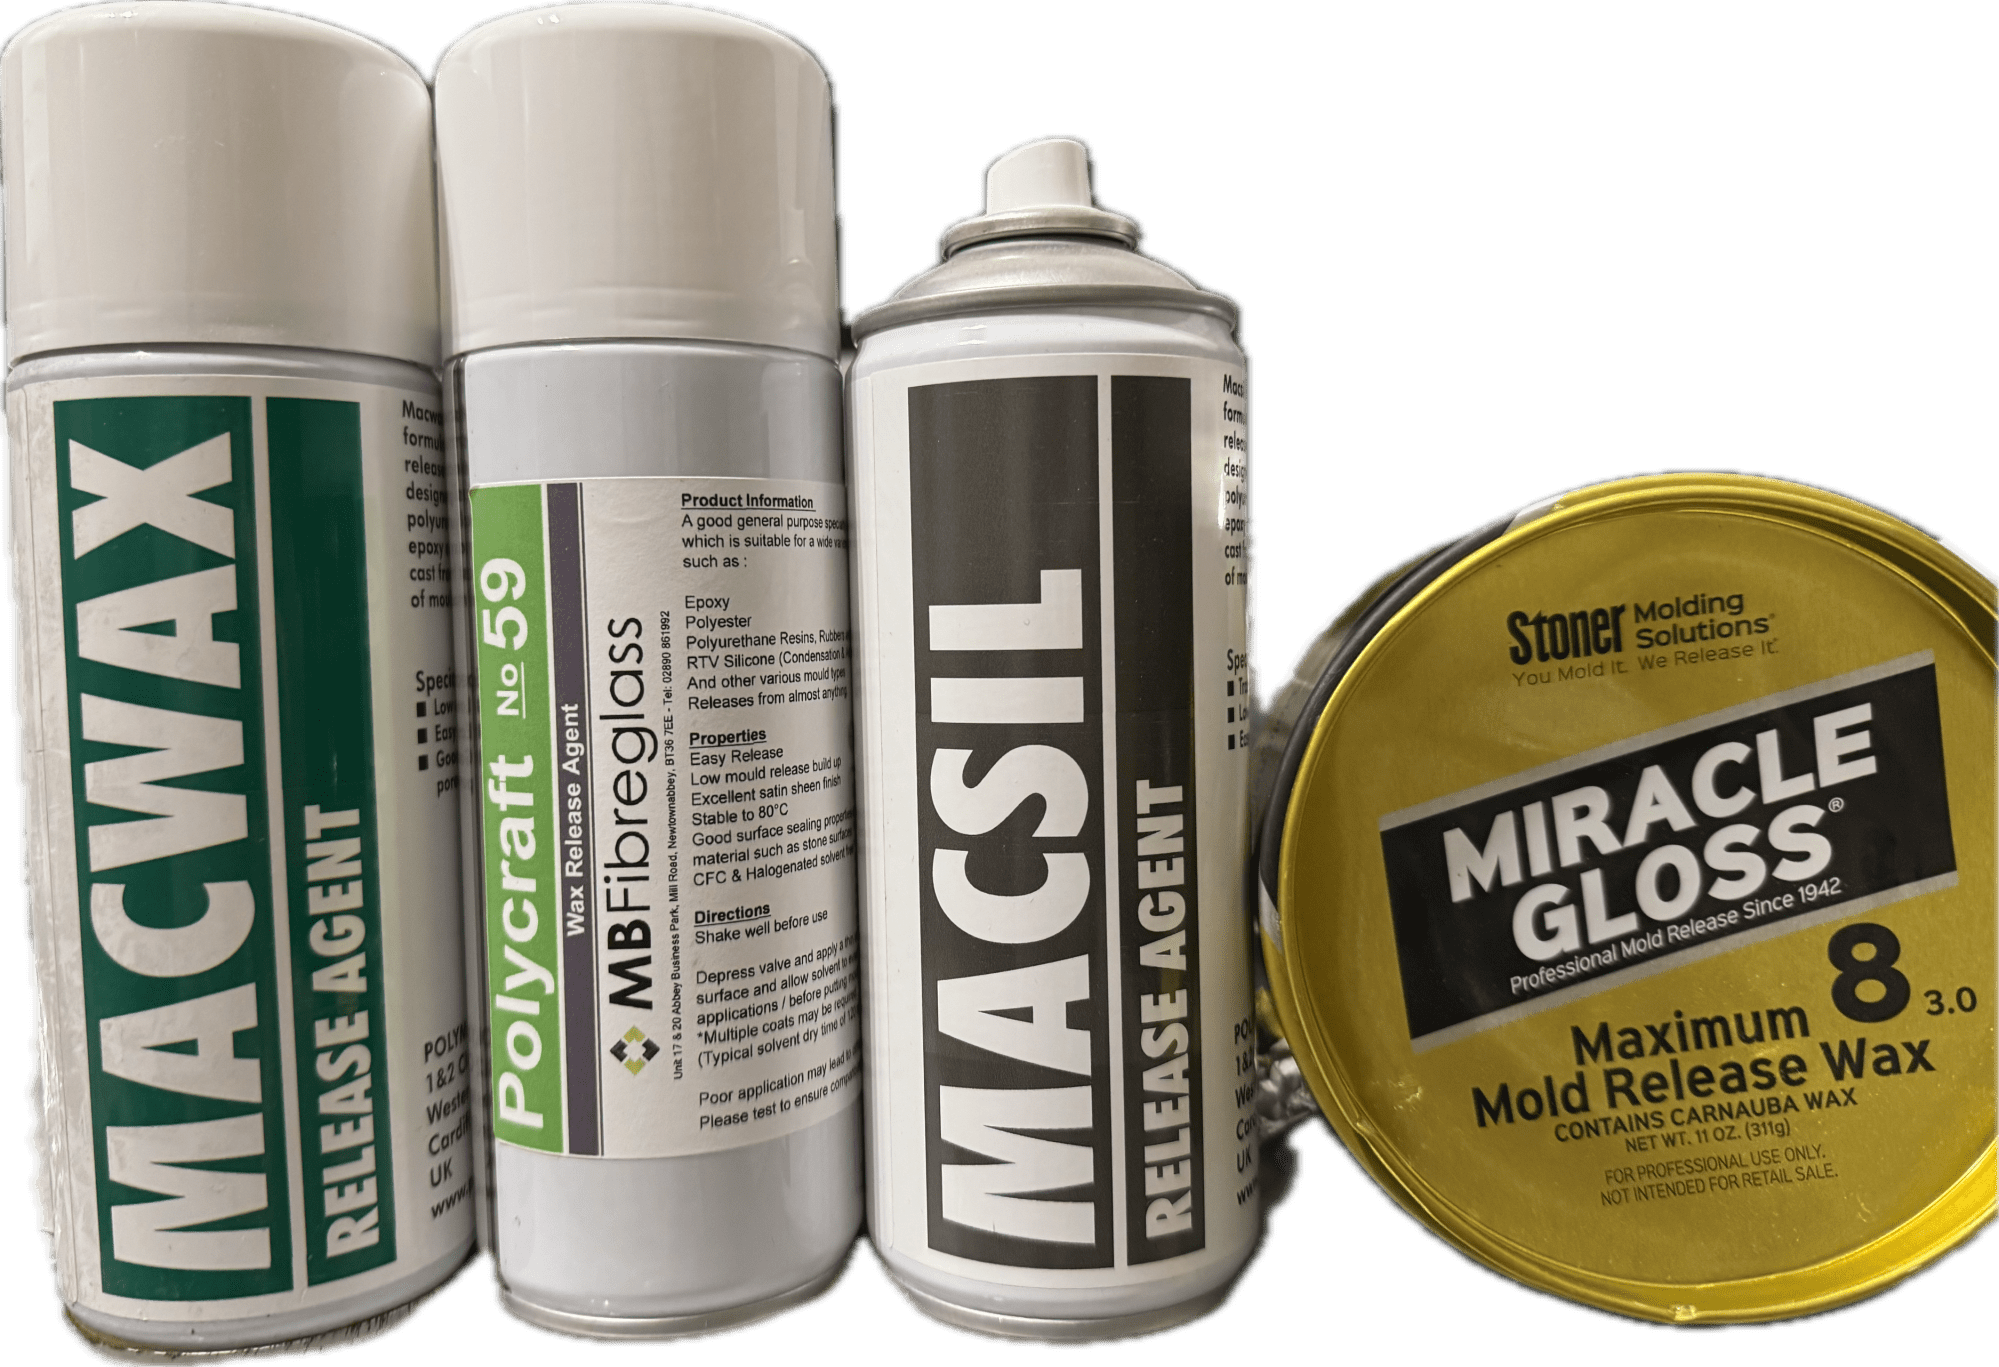
To obtain a better surface finish, I started using a silicone-based release agent. I figured the waxy spray would dispense lots of little wax particles along with solvent, and those little wax bits would be the thing ruining the clarity of my work.
The silicone material is guaranteed to create a finer and more even film at the micro level, which would aid the interface between the Mylar film and resin post-demoulding to become smoother. But when I went to use it, I found it leaves a slick oil-like layer that did not help release.
There were several reasons that could have caused this failure. I may have applied too much release agent, or it hadn’t dried enough to make a film. Maybe both of these were also at work at once. The Mylar film itself may have been poorly adhered to silicone-based release agent, or its chemical properties, if not or is fully dried, may have interfered with the curing reaction of the resin.
In the end, because of the operating problems posed by this release agent (which made surfaces noticeably oily), as well as the bad results I got from experimenting with them, I decided to seek alternative demolding methods.
(Above, it’s the result of hand-applied release wax)
(Below is the result of wax-based spray.)
During my latest try, I used a Mould Release Wax. This type of release agent needed more classic and tedious application method which was that apply it on Mylar film with a microfiber cloth, let it sit for a time and then buff it off to leave a very thin residual left behind.
Despite the additional time and effort involved, I discovered that using this material did not create the foggy effect I had encountered with previous methods. The results were significantly better, preserving the clarity and visual properties I was seeking in my work.
Based on these superior results, I concluded that this was the optimal approach for my purposes and have continued to employ this method in my subsequent artworks.
After that, I also experimented with using Photoshop and various AI tools to create concept images for my new pieces for my MA show. Below are some of the concept images I created.